-
The Alocity access intelligence readers physically connect to an entry in order to manage access. Entries are doors, but can also be gates, turnstiles, and elevator floors. An entry is always secured with an Alocity reader. Door Management is where you add and manage devices which are installed on entries.
To manage doors, open the Access Control module and select Doors from the left menu. Then click a door in the list to open it.
Note: The Type column shows what runs the door. Embedded doors are Alocity F3D100 readers and AI-1000 intercoms, and open the tabbed page described below. Mercury doors run on a Mercury panel and open a different page, and you add them with Create Door: see Creating and Managing Mercury Doors.
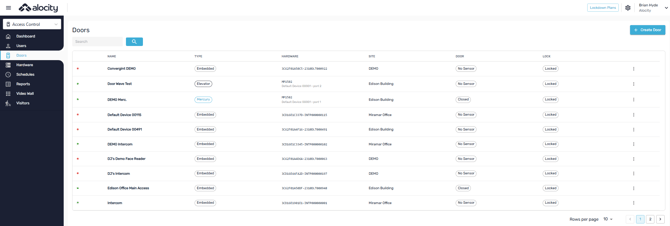
- Create Door: Adds a Mercury door. F3D100 and AI-1000 doors appear when you add the device.
- Search: Find a door by name.
- Status: Green when the door's device is online, red when it's offline.
- Type: Embedded for F3D100 and AI-1000, Mercury for a door on a Mercury panel, Wireless lock for a seam lock.
- Hardware: The device serial, or the Mercury panel, sub-panel and reader port.
- Door: The door contact: Open or Closed, or No Sensor when no contact is fitted.
- Lock: Locked, Unlocked, or Unlocked with Schedule during an automatic open schedule.
- Row menu (⋮): Actions for that door.
When you open an F3D100 or AI-1000 door, you see the following screen with tabs.
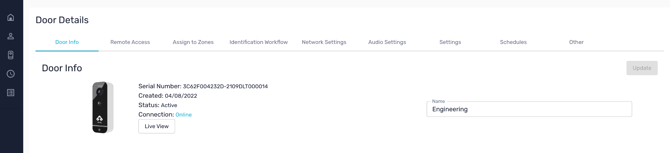
- Door info: Provides general information about the device, and where you can name the device, and see live view video stream.
- Remote Access: Remotely Unlocked door, keep door unlocked, or lockdown system, reboot device and show lock/door state.
- Identification Workflow: Allows you to set rules on what credentials to use. For example, you can set a 2FA - where users must present their card and then their face to authenticate.
- Network Settings: Set DHCP or static IP, gateway and netmask configurations.
- Audio Settings: Set the device's volume and audio alerts.
- Door Settings: Set relay, request to exit, door contacts, and wiegand type configurations.
- Schedules: View what schedules are assigned to this dorr/device.
Set a custom door/device name - this is helpful to quickly identify and report on the device. (e.g. Front Door, Lobby, Elevator etc.)
- Go to the Door Info tab.
- Enter the custom name in the box and click update.
Unlock door remotely
- On the Dashboard, find the Doors panel on the right.
- Click Unlock next to the door. Use the Site filter to narrow the list.
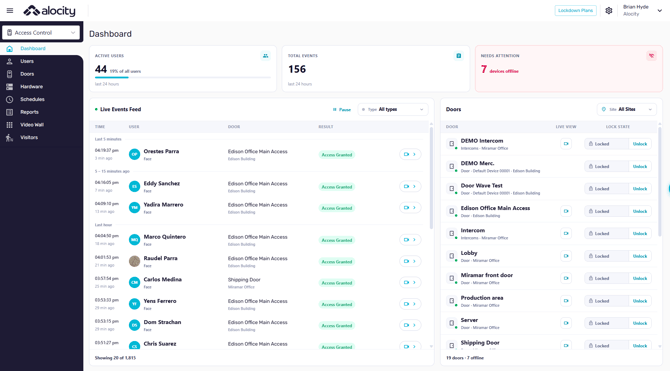
- Site filter: Show doors at one site or all sites.
- Door: Name, status dot and the device it runs on.
- Live View: Opens the camera for the door, where there is one.
- Lock state: Locked or Unlocked.
- Unlock: Unlocks the door remotely, without being at the reader.
Keep Door Unlocked
- Select Doors from the menu
- Select the door/device from the list
- Go to the Remote Access Tab
- Toggle the Keep Door Unlocked Selection to on
- To save click on update.
Lockdown Door
- Select Doors from the menu
- Select the door/device from the list
- Go to the Remote Access Tab
- Toggle the Lockdown Door Selection to on
- To save click on update.
English