
The first step in elevator setup is defining the floors at the site.
1. Open Elevator Settings
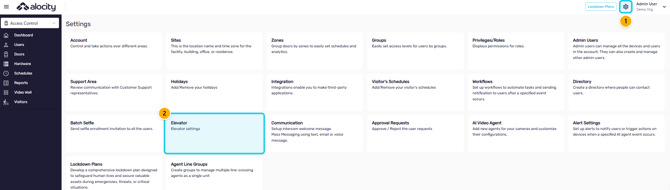
- Select the gear icon to open Settings.
- Select the Elevator tile. The page is titled Floors.
2. Create and Review Floors
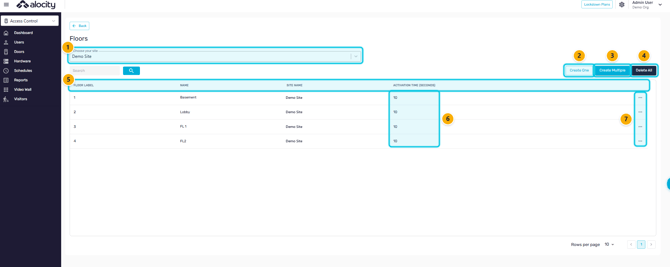
- Choose your site: select the site the floors belong to.
- Create One: add a single floor with a Floor label (for example 1, PH or G) and a Name.
- Create Multiple: enter the Number of floors to create several at once, then rename them as needed.
- Floor list: shows each floor's label, name, site and activation time.
- Row menu: Edit to rename a floor or change its Activation Time (seconds), or Delete.
- Activation time is how long the floor button stays enabled after a valid credential. New floors start at 10 seconds; set it with Edit. Increase it if users need more time.
IMPORTANT: Delete All removes every floor for the site, including floors that are mapped or used in schedules. You must type "delete" to confirm.
Next Step
Continue to Activating Elevator Control and Mapping Floors to Relays.
For questions or assistance, please contact your account manager or email support@alocity.com.