
AI alerts notify people, or trigger actions on devices, when an AI agent detects an event on a camera. This article explains how to create an alert, manage alert rules, mute alerts and review alert history.
1. Where Alerts Are Set Up
- From the agent: in Settings (⚙ in the top bar) › AI Video Agent › [agent], click the bell on a configured camera, or … › Alert. This creates an alert for that agent on that camera.
- Alert Settings: Settings › Alert Settings lists every alert rule on the account.
- Workflows: Settings › Workflows automates tasks and notifications after events across the platform.
2. Create an Alert
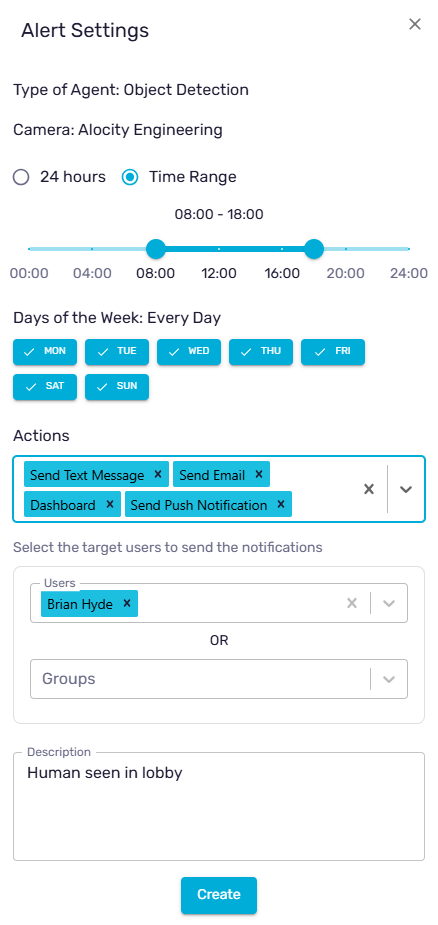
- Go to Settings (⚙ in the top bar) › AI Video Agent, open the agent and click the bell on the configured camera. The Alert Settings dialog shows the Type of Agent and Camera.
- Choose when the alert is active: 24 hours (default), or Time Range and drag the slider (default 08:00 – 18:00).
- Under Days of the Week, click MON to SUN to turn days off or on. All days are on by default.
- Under Actions, choose one or more actions (see the table below).
- For notification actions, Select the target users to send the notifications: pick from Users or Groups.
- Enter a Description so the alert is easy to find in the list, for example "After-hours intrusion – Loading Dock".
- Click Create.
| Action | What it does |
|---|---|
| Send Text Message | Sends an SMS to the selected users or groups |
| Send Email | Sends an email to the selected users or groups |
| Send Push Notification | Sends a push notification to the Alocity 1iD app |
| Dashboard | Shows the event on the Control Center dashboard |
| Strobe Lights | Triggers strobe lights on connected devices [VERIFY: which devices; set under Target Doors?] |
| PA Announcement |
Plays an announcement on connected devices [VERIFY: which devices and how the message is set] |
| Lock Down Door |
Lock Down one or Multiple doors |
Tip: Use schedules to cut noise. For example, send intrusion alerts only outside business hours, and send queue alerts only during opening hours.
3. Manage Alert Rules
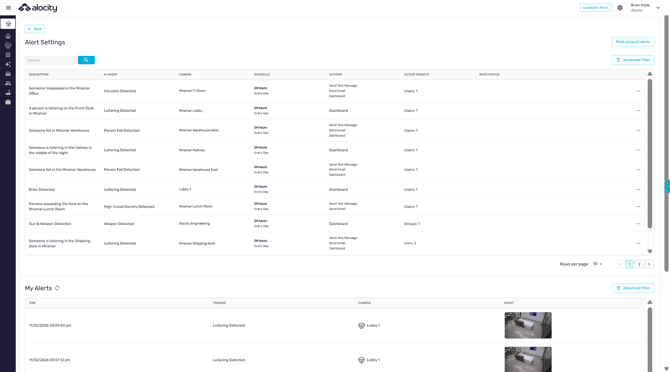
Go to Settings › Alert Settings. Each rule shows its DESCRIPTION, AI AGENT, CAMERA, SCHEDULE, ACTIONS, ACTION TARGETS and MUTE STATUS.
- Use Search or Advanced Filter (Mute status) to find a rule.
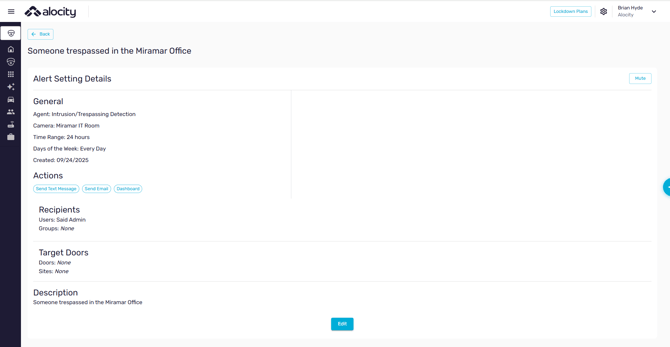
- Click a rule to open Alert Setting Details: the agent, camera, time range, days, actions, recipients, target doors and sites, and description. Click Edit to change it.
- Use the row … menu to Mute or Delete a rule.
- Click Mute account alerts to pause every alert on the account, for example during maintenance or testing.
IMPORTANT: Remember to unmute alerts when the maintenance or testing is finished.
4. Review Alert History
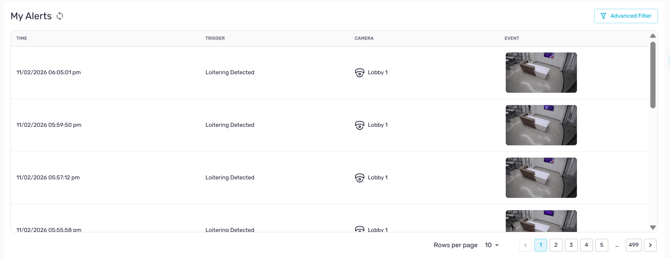
My Alerts on the Alert Settings page lists every alert you received, with TIME, TRIGGER, CAMERA and an EVENT thumbnail. Use the refresh icon to load new alerts, and Advanced Filter to filter by Dates, Cameras and Trigger.
Click an event to open the playback player on a short clip (about 30 seconds) around the moment of detection. From there you can share or download the clip. See Alocity as a VMS.
For agent-by-agent history and analytics, open AI Insight from the left menu and select an agent. Filter by site, camera and date range (for example, Last 7 days).
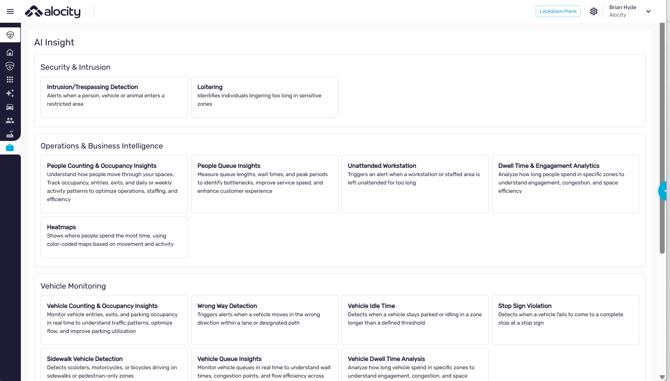
Note: Agent names can differ slightly between AI Video Agent, AI Insight and alert triggers. For example, an Intrusion/Trespassing Detection alert appears in history as Intrusion Detected, and Fall Detection as Person Fall Detected.
For questions or assistance, please contact your account manager or email support@alocity.com.